In this tutorial we will learn how to get started using Protocol Buffers with the Arduino core, both running on the ESP32 and on the ESP8266. The tests on the ESP32 were performed using a DFRobot’s ESP-WROOM-32 device integrated in a ESP32 FireBeetle board. The tests on the ESP8266 were performed on a DFRobot’s ESP8266 FireBeetle board.
Introduction
In this tutorial we will learn how to get started using Protocol Buffers with the Arduino core. In this introductory example, we will check how to declare a message type and how to encode it. This tutorial was tested both on the ESP32 and on the ESP8266.
Protocol buffers are a data serialization format from Google which are supported in multiple programming languages [1]. Protocol Buffers messages are encoded in a binary format [2], which means they are not human readable unless we decode them back to a readable format.
One of the main advantages of using Protocol Buffers is that the serialization and deserialization process is fast and the generated messages are small. For example, in the project website it is claimed that Protocol Buffers are 20 to 100 times faster and 3 to 10 times smaller than XML [3]. Around the web, there are also a lot of benchmarks that indicate Protocol Buffers are faster and smaller than JSON [4][5].
For our tests we are going to use Nanopb, a C implementation of Protocol Buffers that targets 32-bit microcontrollers [6]. You can check the GitHub page of the library here.
When using Protocol Buffers, we need to specify how we want to structure the data that will be serialized. This is done by defining message types in a .proto file [3]. After the definition of the messages, we need to run a protocol buffer compiler for the specific language we are using, to generate data access classes for our messages [3].
The tests on the ESP32 were performed using a DFRobot’s ESP-WROOM-32 device integrated in a ESP32 FireBeetle board. The tests on the ESP8266 were performed on a DFRobot’s ESP8266 FireBeetle board.
Setting up the environment
In order to get started, we need to download the latest release of Nanopb from the downloads page. The downloads page includes versions for Linux, Mac and Windows, as shown below at figure 1. I’ll be performing the tests on a Windows 8.1 machine.

Figure 1 – Downloading Nanopb.
Once the download finishes, unzip the content. You should get a folder hierarchy similar to figure 2.

Figure 2 – Folder hierarchy of Nanopb.
In the previous image, there are two highlighted areas that are of interest for this tutorial. The first one is the generator-bin folder, which contains the already mentioned compiler that we will need to use to compile our .proto files.
Inside that folder, we can create a new folder called “proto_files“, where we will place our message definitions. Note that the name of the folder is arbitrary as it is its location. Naturally, we can define it where we want it in our computer as long as we use the correct paths when running the compilation tool.
Inside the folder, create a file called test.proto. For now, you can leave it empty. We will get back to it later.
If you go back to the root of the Nanopb project, you should see some .c and .h files, as also highlighted in figure 2. We will need those files when compiling our code. So, copy them all. The list of files copied should be the following:
- pb.h
- pb_common.h
- pb_common.c
- pb_encode.h
- pb_encode.c
- pb_decode.h
- pb_decode.c
In order to be able to use Nanopb as a regular Arduino library, go to the folder where your Arduino libraries are. Typically, the path where the libraries are located is:
C:\Users\#yourUserName#\Documents\Arduino\libraries
Once you locate the Arduino libraries folder, create a new folder inside called Nanopb, next to your other libraries. There, paste the previously copied .c and .h files.
Defining the .proto file
Now that we have created our Nanopb library, we need to go back to the .proto file, so we can define our message.
In the first line, we need to declare the syntax version we are using to define our message. In our case, we will be using the proto2 syntax.
syntax = "proto2";
Next, we need to define our message type. We start by using the message keyword, followed by the actual name of our message type. I’ll be calling it TestMessage.
Then, the message fields are declared between curly brackets.
message TestMessage {
// body of message
}
For each field we declare in our message, we need to specify its data type and its name. Additionally, each field needs to have a unique number. The unique numbers are used to identify the fields in the binary data format [7], so the name of the field is not serialized.
Additionally, for each field, we need to specify if it is optional, required or repeated. Required means the message must have that field exactly one time, optional means the field can not exist or the message can have it at most one time, and repeated means the field can be repeated any number of times (including zero) [7].
In or message, we will declare an integer field called test_number that will be required. For this simple example we will only make use of one field and thus we should assign it the unique number 1.
required int32 test_number = 1;
The final file content can be seen below. After finishing its edition, save it.
syntax = "proto2";

message TestMessage {
    required int32 test_number = 1;
}
Now we need to compile the .proto file, so we can use it in our code. In case of Nanopb, since it offers a pure C implementation, this compiling procedure will generate C structs to represent our messages.
In order to compile it, open a command prompt and navigate to the generator-bin folder. There, the command to compile the messages has the following syntax, where you should change #pathToProtoFile# to the location of your .proto file:
protoc --nanopb_out=. #pathToProtoFile#
If you created a proto_files inside the generator-bin folder and placed the .proto file there like I did, the command is:
protoc --nanopb_out=. proto_files/test.proto
After running the command, a test.pb.c and a test.pb.h file should be created in the folder where you have your .proto definition, as shown in figure 3.

Figure 3 – Generated files.
If you open the .h file, you should see that it has a struct called TestMessage defined there, as shown in figure 4. It matches the message name we have used in the .proto file. Also, the struct as an integer field called test_number, like we also specified.

Figure 4 – Struct definition in generated header file.
We will need both the .c and the .h file, so copy them. Since these are the message definitions which are specific of our program, we should not place them in the Nanopb library folder we have created previously.
So, on your Arduino sketch folder, simply create a folder called src and paste the previously copied filed there, as shown in figure 5.
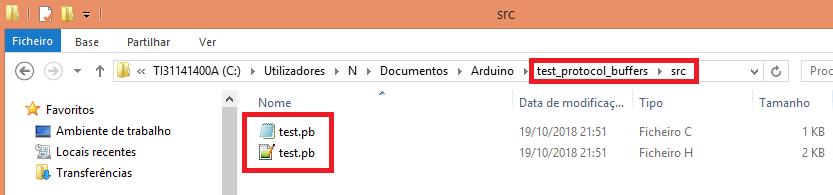
Figure 5 – Arduino sketch folder with .c and .h files.
The code
We will start our code by doing some includes. The first one corresponds to the .h file we have obtained after compiling our .proto file. This will make available the struct that was created by the compilation process.
Remember that we have the file in a folder inside the sketch directory, so we need to provide the correct path when including the file.
#include "src/test.pb.h"
After that,we need to include the header files we have pasted in our Nanopb library folder, with the exception of the pb_decode.h, since we are not going to decode the message in this introductory tutorial.
#include "pb_common.h"
#include "pb.h"
#include "pb_encode.h"
Moving on to the Arduino setup function, we will start by opening a serial connection, to later output some results of our program.
Serial.begin(115200);
Then, we will declare an array of bytes that will serve as a buffer to hold the serialized message. For this tutorial we will declare a buffer with a size big enough to hold all our structure, so we won’t need to worry about calculating the maximum size the message can have.
uint8_t buffer[128];
Next, we will declare our message data structure and initialize it. Nanopb generates a define that allows to initialize the data struct, which has the following name:
#MessageName#_init_zero
So, in our case, the declaration and initialization of the structure is done like below:
TestMessage message = TestMessage_init_zero;
Nanopb uses the concept of streams to access data in encoded format [8]. So, the next thing we will do is calling the pb_ostream_from_buffer function, which constructs an output stream for writing into a memory buffer [9].
We need to pass as first input our previously declared buffer and as second input the maximum number of bytes to write, which should be the size of our buffer. This function call will return a struct of type pb_ostream_t.
pb_ostream_t stream = pb_ostream_from_buffer(buffer, sizeof(buffer));
Now that we have our stream, we should set the value of our message field before we encode it. Recall that we had a field called test_number in our .proto file, which also exists in the TestMessage struct we have declared.
So, we will access that field of the struct and assign it a value.
message.test_number = 540;
Now, to do the actual encoding, we need to call the pb_encode function.
As first input, we need to pass the address of our pb_ostream_t variable. As second, we need to pass a fields description array that is auto-generated for us in the compilation process, which has the following syntax:
#MessageName#_fields
As third and final argument, we need to pass the address of our TestMessage struct.
As output, this function call returns a Boolean value that indicates if the encoding of the content was successful (true) or not (false), which we can use for error check.
bool status = pb_encode(&stream, TestMessage_fields, &message);

if (!status)
{
    Serial.println("Failed to encode");
    return;
}
If the serialization is performed without errors, our buffer should already contain the data. But before we access it, we can check how many bytes were written by accessing the bytes_written field of the pb_ostream_t variable.
Serial.println(stream.bytes_written);
Finally, we will iterate through all the bytes of the encoded message and print them to the serial port in hexadecimal format. Note that since we know exactly how many bytes were written, we can use that value as stopping condition for our loop, rather that reading the whole buffer.
for(int i = 0; i<stream.bytes_written; i++){
  Serial.printf("%02X",buffer[i]);
}
The final code can be seen below, with some additional prints for readability.
#include "src/test.pb.h"

#include "pb_common.h"
#include "pb.h"
#include "pb_encode.h"

void setup() {

  Serial.begin(115200);

  uint8_t buffer[128];

  TestMessage message = TestMessage_init_zero;

  pb_ostream_t stream = pb_ostream_from_buffer(buffer, sizeof(buffer));

  message.test_number = 540;

  bool status = pb_encode(&stream, TestMessage_fields, &message);

  if (!status)
  {
      Serial.println("Failed to encode");
      return;
  }

  Serial.print("Message Length: ");
  Serial.println(stream.bytes_written);

  Serial.print("Message: ");

  for(int i = 0; i<stream.bytes_written; i++){
    Serial.printf("%02X",buffer[i]);
  }
}

void loop() {}
Testing the code
To test the code, simply compile it and upload it to your device. Once the procedure finishes, open the Arduino IDE serial monitor. You should get an output similar to figure 6, which shows both how many bytes were written and the binary message, in hexadecimal format.

Figure 6 – Output of the program, including the encoded message.
Copy the whole message bytes. Then, go to this online decoder and paste the content in the first text input box (the one that accepts hexadecimal format). It should output a result similar to figure 7, which shows the value we have assigned to our field (540). Note that the name of the field is not included in the serialized message but rather the unique number of the field, which makes the message much smaller (only 3 bytes).

Figure 7 – Decoding the message with an online tool.
References
[1] https://developers.google.com/protocol-buffers/
[2] https://developers.google.com/protocol-buffers/docs/encoding
[3] https://developers.google.com/protocol-buffers/docs/overview
[4] https://codeburst.io/json-vs-protocol-buffers-vs-flatbuffers-a4247f8bda6f
[5] https://auth0.com/blog/beating-json-performance-with-protobuf/
[6] https://jpa.kapsi.fi/nanopb/
[7] https://developers.google.com/protocol-buffers/docs/proto
[8] https://jpa.kapsi.fi/nanopb/docs/concepts.html#streams
[9] https://jpa.kapsi.fi/nanopb/docs/reference.html#pb-ostream-from-buffer
Pingback: ESP32 / ESP8266 Protocol Buffers: messages with strings – techtutorialsx
Pingback: ESP32 / ESP8266 Protocol Buffers: messages with strings – techtutorialsx
Pingback: ESP32 Protocol buffers: Encoding a DS18B20 temperature measurement – techtutorialsx
Pingback: ESP32 Protocol buffers: Encoding a DS18B20 temperature measurement – techtutorialsx
When I try to do this, it gives me an error saying “‘TestMessage’ was not declared in this scope”. Tried it with both the latest, and your version of nanopb.
You did not link your *.pb.h and *.pb.c correctly.
It’s most probably because of the path includes, somewhere.
There are several ways to fix this.
Here is one:
in this Tuto,
When you include in arduino IDE,
#include “src/test.pb.h”
Actually, inside the test.pb.c file, it looks for this path : #include “proto_files/test.pb.h”
for the header. So just try creating also a folder “proto_files” inside the src folder.
and put the header, test.pb.h there.
Once you have done that, just change your include in the arduino IDE.
now, all the path are correct.
#include “src/proto_files/test.pb.h”