The objective of this post is to explain how to connect the LinkIt Smart to a WiFi network and thus, making it able to access the Internet.
Configuring the device
In order to follow this tutorial, I strongly recommend you to complete the getting started tutorial first, which explains how to connect to the LinkIt Smart for the first time working as an Access Point, and configure the root account password.
To start this tutorial, we first power on the LinkIt Smart Duo board and connect to it’s network, as shown in figure 1.
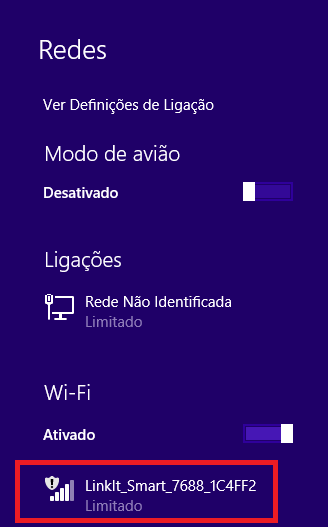
Figure 1 – Connecting to the LinkIt Smart network.
Naturally, in this configuration, the LinkIt Smart is not connected to the Internet, so we are accessing a network hosted by the device.
The next step is accessing to the Web UI of the LinkIt Smart, as we did in the getting started tutorial. Remember that we can access by it’s name if our computer can translate mDNS names. If this is the case, we just need to open a web browser and type mylinkit.local in the web browser.
For some operating systems, we may need to install Bonjour in order to be able to translate local domain names into IPs using mDNS. More detail is explained in the getting started tutorial.
If you are not able to access the web UI using the mylinkit.local domain, you can use the default IP 192.168.100.1, as shown in figure 2.
Figure 2 – Accessing the LinkIt Smart web UI using the device default IP.
Assuming that you have completed the first tutorial, just type your password and sign in. If not, please define a password for the root account of the device.
On the configuration page that will open, choose the network tab, as illustrated in figure 3.

Figure 3 – Web UI configuration page.
In the network configuration page, select “Station mode” and in the dropdown bellow click the small arrow to show the available WiFi networks. Choose your WiFi network name from the list, as shown in figure 4.

Figure 4 – Selecting the WiFi Network to connect the LinkIt Smart.
Finally, insert your password and click the “Configure & Restart” button, as shown in figure 5. Be careful to enter the correct password, since the board will restart after hitting the button. You can use the “Show Password” option to check if you are inputting it correctly.
If you entered the AP’s password incorrectly, you can reset the board to Access Point mode by clicking the WiFi button of the board for at least 5 seconds and releasing it [1].

Figure 5 – Finishing the WiFi connection configuration.
After that, the web UI should show you a message, as shown in figure 6. Nevertheless, this message is not mentioned in Mediatek’s getting started guide, so it’s possible that older versions of the board’s firmware didn’t have it.

Figure 6 – LinkIt Smart rebooting message.
As indicated in the message, after the board reboots, it should be connected to the WiFi network. Remember that our computer was connected to the LinkIt Smart WiFi network, so we must now reconnect to our WiFi network. Otherwise, we won’t be able to connect to the LinkIt Smart.
Important: To test if everything was correctly configured, we just need to reload the web UI, after reconnecting to our home network. Nevertheless, this will only work if we connect using the mylinkit.local, meaning that our computer will be translating it to an IP using mDNS.
We are no longer able to access the web UI using the 192.168.100.1 IP address because the LinkIt Smart is no longer hosting the WiFi network. So, the LinkIt Smart will now have a new IP in the WiFi network it is connected to, which is assigned by the router and will vary from network to network.
So, if our computer can’t resolve names into IPs using mDNS, we will need to discover the IP assigned to the LinkIt Smart. One way of doing this is connecting to the router’s configuration page and checking the IPs of the devices connected to it. Naturally, this will depend on the router, and explaining how to do it is outside of the scope of this post.
So, from now on, I’m assuming that we will be using mDNS to connect to the LinkIt Smart. If that’s not the case, you should change the mylinkit.local name for the IP of the device in your network, in the next steps.
Pinging a website
To finish this tutorial, we will connect to the LinkIt Smart Operating System using SSH and ping a website.
To do this, we will use Putty, which is a SSH and Telnet client for Windows [2]. So, just download the tool, open it and configure it as shown in figure 7.

Figure 7 – Connection to the LinkIt Smart Duo using Putty.
If you are connecting for the first time to the LinkIt Smart via Putty and a warning window appears, just click “yes”.
On the command window that appears, just enter root in the “login as” and then enter the password defined in the web UI. This is exemplified in figure 8.

Figure 8 – Login via Putty.
Finally, just ping a website of your choice using the ping command. As shown in figure 9, you can ping http://www.google.com with the following command:

Figure 9 – Pinging http://www.google.com from the LinkIt Smart.
If everything is working fine, you should see the packets being transmitted. Hit ctrl+c to end the command.
Related Posts
- Linkit Smart Duo: Blinking a LED with Python
- Linkit Smart Duo: Getting started
- Linkit Smart Duo: Python support
- Linkit Smart Duo
Related Content
- Linkit Smart FAQs page
- Linkit Smart factory reset
- Linkit Smart Developer’s guide
- Linkit Smart Getting started guide
- Linkit Smart plataform page
- mDNS wikipedia page
- Putty download Page
- Bonjour download page
References
[1] https://labs.mediatek.com/fileMedia/download/4ef033b8-80ca-4cdb-9ad6-1c23836c63de
Pingback: LinkIt Smart Duo: Transferring files with SCP | techtutorialsx
Pingback: LinkIt Smart Duo: Transferring files with SCP | techtutorialsx
Pingback: ESP8266: Query LinkIt Smart mDNS services | techtutorialsx
Pingback: ESP8266: Query LinkIt Smart mDNS services | techtutorialsx
Pingback: LinkIt Smart Duo: Running a Flask server | techtutorialsx
Pingback: LinkIt Smart Duo: Running a Flask server | techtutorialsx