The objective of this post is to explain how to use MicroPython on the ESP8266.
Introduction
The objective of this post is to explain how to use MicroPython on the ESP8266. MicroPython is an implementation of Python that includes a small subset of the Python standard library and is optimized to run on microcontrollers [1].
Fortunately, one of the supported microcontrollers is the ESP8266 [2], allowing us to run MicroPython in boards such as the NodeMCU.
Testing
The installation of MicroPython on the ESP8266 is very straightforward and well explained here, so I’m not covering in detail how to do it.
But to sum up, we will first need to get the firmware from here. After the download, we will have the binary to upload to the ESP8266. Note that the best option is using the stable releases.
Also, take in consideration that there are some limitations for ESP8266 boards that only have 512 KB of flash, which need a special, more limited, version of the firmware [3]. You can get the information of your board’s flash as can be seen here.
To upload the binary file to the ESP8266, we will need esptool, which allows to communicate with the ROM bootloader of the ESP8266 [4]. As indicated in the getting started page, the easiest way to get the esptool is by having a Python installation on the computer with pip (a Python package installer), and running the following command:
pip install esptool
After the installation, you can check here the commands needed to upload the MicroPython firmware to the board.
On the mentioned commands, please note the the /dev/ttyUSB0 works for Linux (and you still need to change the USB0 to the USB port where the ESP8266 is). On Windows, we should just use COMX, where X is the port of our ESP8266. If we have a previous Arduino IDE installation with ESP8266 support, it will be easy to check in which port is our ESP8266.
Also, when uploading the firmware, don’t forget to put the whole path for the binary file in the esptool command, if you are not executing the command in the same directory of the bin file.
After uploading the firmware, the easiest way to interact with the ESP8266 is by using Tera Term. Tera Term is a Windows terminal program [5] that will allow us to connect to the ESP8266 via Serial and interact with the MicroPython prompt. You can download it here.
After installing Tera Term, open it and select the COM port of the ESP8266, as indicated in figure 1. Note that my ESP8266 is on COM25.

Figure 1 – Connection to the ESP8266 via Tera Term.
After that, you will get some garbage on the terminal window since, by default, Tera Term has a baud rate of 9600 and the MicroPython prompt uses 115200 [6]. To change this configuration on Tera Term, click Setup -> Serial Port… and change the baud rate to 115200, as indicated in figure 2.

Figure 2 – Changing the baud rate of Tera Term.
Now, if you write something and hit enter, you should get a Python error message, but now in a readable format, as shown in figure 3.
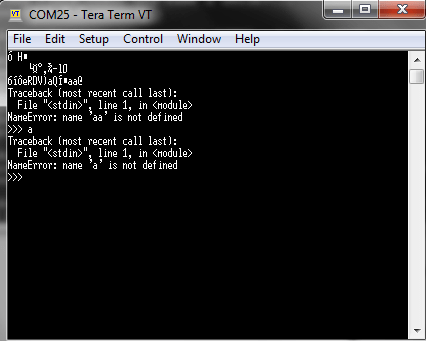
Figure 3 – Tera Term with readable characters.
Hello World
Now, to finish this tutorial, let’s run some Python code. To do so, just write the following command and hit enter.
print ("Hello World")
You should get an “Hello World” message, as shown in figure 4.

Figure 4 – MicroPython ESP8266 “Hello World”.
Related content
References
[2] https://docs.micropython.org/en/latest/esp8266/index.html
[3] https://docs.micropython.org/en/latest/esp8266/esp8266/tutorial/intro.html
[4] https://github.com/espressif/esptool/
[5] https://learn.sparkfun.com/tutorials/terminal-basics/tera-term-windows
[6] https://docs.micropython.org/en/latest/esp8266/esp8266/tutorial/intro.html#serial-prompt
Technical details
MicroPython version: v1.8.7
Pingback: ESP32 / ESP8266 MicroPython: Running a script from the file system | techtutorialsx
Pingback: ESP32 / ESP8266 MicroPython: Running a script from the file system | techtutorialsx
Pingback: ESP32 / ESP8266 MicroPython: HTTP GET Requests | techtutorialsx
Pingback: ESP32 / ESP8266 MicroPython: HTTP GET Requests | techtutorialsx
Pingback: ESP32 JavaScript: Getting started with Espruino | techtutorialsx
Pingback: ESP32 JavaScript: Getting started with Espruino | techtutorialsx