The objective of this post is to explain how to transfer files from a computer to the LinkIt Smart Duo using the SCP protocol.
Introduction
Since we use a command line environment to access the LinkIt Smart, we can only create files on it using command line editors. One that comes installed with the operating system is vim.
Nevertheless, it’s more comfortable to develop in our computer, in a text editor of our choice, and then upload the file to the LinkIt Smart Duo. A very simple way of doing this is using the SCP protocol.
SCP allows us to copy files over SSH connections [1], meaning that we can have a file in our computer and transfer it to the LinkIt Smart. It can also be used to get files from the LinkIt Smart to our computer.
In this tutorial we will use WinSCP, a free SCP client for Windows. This program will allow us to transfer files from/to the LinkIt Smart using a very simple graphical user interface (GUI). You can download it here.
To follow this tutorial, I’m assuming that the getting started tutorial was already completed, and so the root account is configured. Also, I’m assuming that the LinkIt Smart is connected to a WiFi network, with the procedure explained in this tutorial.
Transferring files to the LinkIt Smart
After installing WinSCP, just launch it. On the window that appears, configure the connection as shown in figure 1. Use the password configured for your root account.

Figure 1 – Configuration of WinSCP to connect to the LinkIt Smart Duo.
As explained in the previous tutorial, if your computer cannot resolve local domains into IPs using mDNS, you need to change the mylinkit.local to the IP of the LinkIt Smart in your WiFi network.
If you are connecting for the first time, you may get a security warning, as shown in figure 2. Just press “yes”.
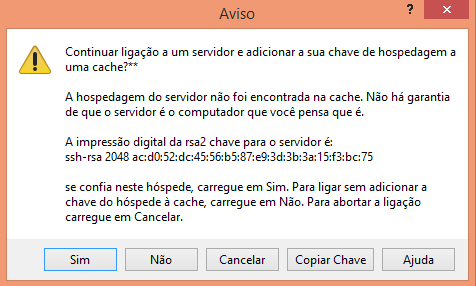
Figure 2 – Security warning.
After WinSCP establishes the connection to the LinkIt Smart, a window will appear, with the left section being a folder in your computer and the right a directory in your LinkIt Smart. In my case, the default folder for my computer is the “My documents”. This is shown in figure 3.
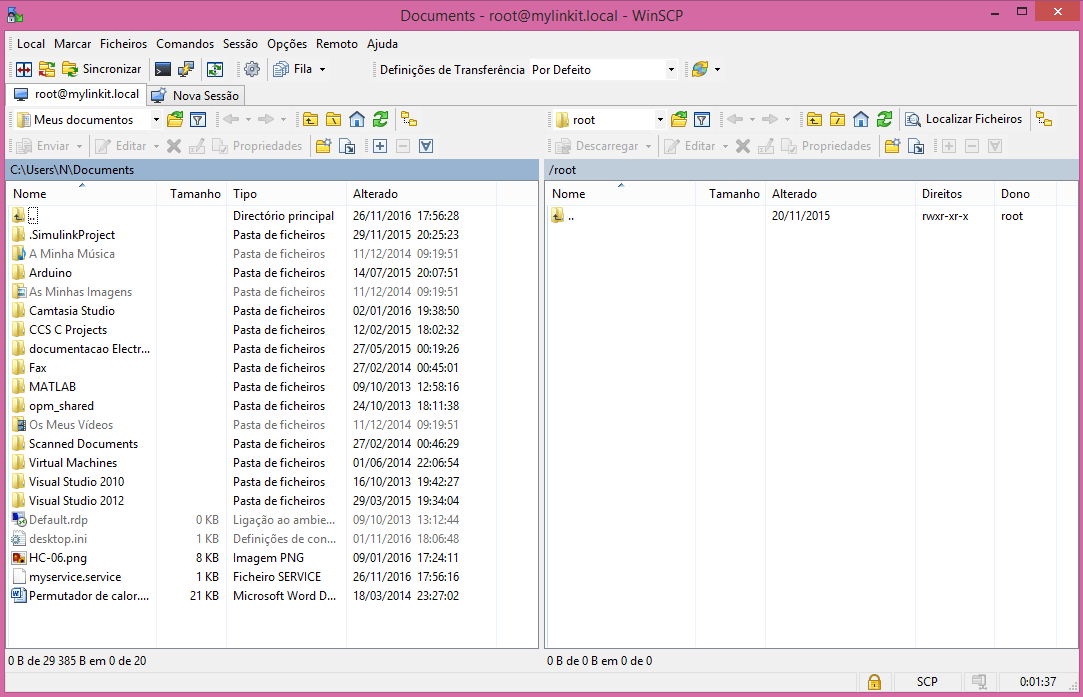
Figure 3 – WinSCP folders view.
You can change the directory of your computer, but for this example I will be staying in the “My documents” folder. Although we could have the file to transfer to the LinkIt Smart already created, we will create a new file from scratch with WinSCP.
To do so from the WinSCP GUI, right click on an empty space on the directory of your computer, select “New” -> “File”, as shown in figure 4 (my GUI is in Portuguese).

Figure 4 – Creating a new file to transfer in WinSCP.
On the window that pops, we need to specify the file name. Let’s assume that we are creating a simple Python script called test.py, as shown in figure 5.

Figure 5 – File naming in WinSCP.
Now, the editor will open. Just type a simple python command and click the save button, as explained in figure 6.
print “Hello World”

Figure 6 – WinSCP file editor.
Close the window and the new file should be visible in the computer directory you are working. Keep in mind that we can directly edit a file in the LinkIt Smart. We just double click on the file on the LinkIt Smart directory and the same editor should appear.
To transfer the file from your computer to the LinkIt Smart, just drag it to the right section of the GUI, corresponding to the LinkIt Smart current directory. The file should now appear on the LinkIt Smart section, as shown in figure 7.

Figure 7 – Transference of file to the LinkIt Smart.
This is the default directory of the LinkIt Smart when we connect to it via SSH. So to confirm if everything was correctly done, we will access to the LinkIt Smart via Putty. If you didn’t do it before, check here how to do it.
Now, in the default directory, just type ls and hit enter to list the files in that directory. ls is the Linux command to list files in a directory. As shown in figure 8, you should be able to see the test.py file we transferred before.

Figure 8 – File transferred via SCP.
To test if we can run the Python script, just type the following command and press enter:
python test.py
The Python script will run and we should get a result similar to the one in figure 9.

Figure 9 – Python “Hello World” script.
Transferring files from the LinkIt Smart
To finish this tutorial, we will go back to WinSCP, rename the file from the LinkIt Smart and transfer it back to our computer
To rename the file, just right click on it and choose rename. Rename it to test2.py, as shown in figure 10.

Figure 10 – Renaming file in the LinkIt Smart using WinSCP.
You can go back to the Putty window and send another ls command to confirm the file name has been changed in the LinkIt Smart.
Now, to transfer the file to your computer, just drag it to the left section of the GUI. The file should now be available on the directory, as shown in figure 11.

Figure 11 – Downloading file from the LinkIt Smart.
Finally, to delete the file from the LinkIt smart, just right click it and click delete, as shown in figure 12.

Figure 12 – Deleting a file from the LinkIt Smart.
You can confirm again the file as deleted from the LinkIt Smart using Putty and the ls command.
Related Posts
- Linkit Smart Duo: Blinking a LED with Python
- Linkit Smart Duo: Getting started
- Linkit Smart Duo: Python support
- Linkit Smart Duo
- LinkIt Smart Duo: Connection to WiFi Network
References
[1] https://linuxacademy.com/blog/linux/ssh-and-scp-howto-tips-tricks/
Pingback: LinkIt Smart Duo: Sending HTTPS requests | techtutorialsx
Pingback: LinkIt Smart Duo: Sending HTTPS requests | techtutorialsx
Pingback: LinkIt Smart 7688 Duo: Subscribing to MQTT topic | techtutorialsx
Pingback: LinkIt Smart 7688 Duo: Subscribing to MQTT topic | techtutorialsx
Pingback: LinkIt Smart 7688 Duo: Publishing messages to MQTT topic | techtutorialsx
Pingback: LinkIt Smart 7688 Duo: Publishing messages to MQTT topic | techtutorialsx